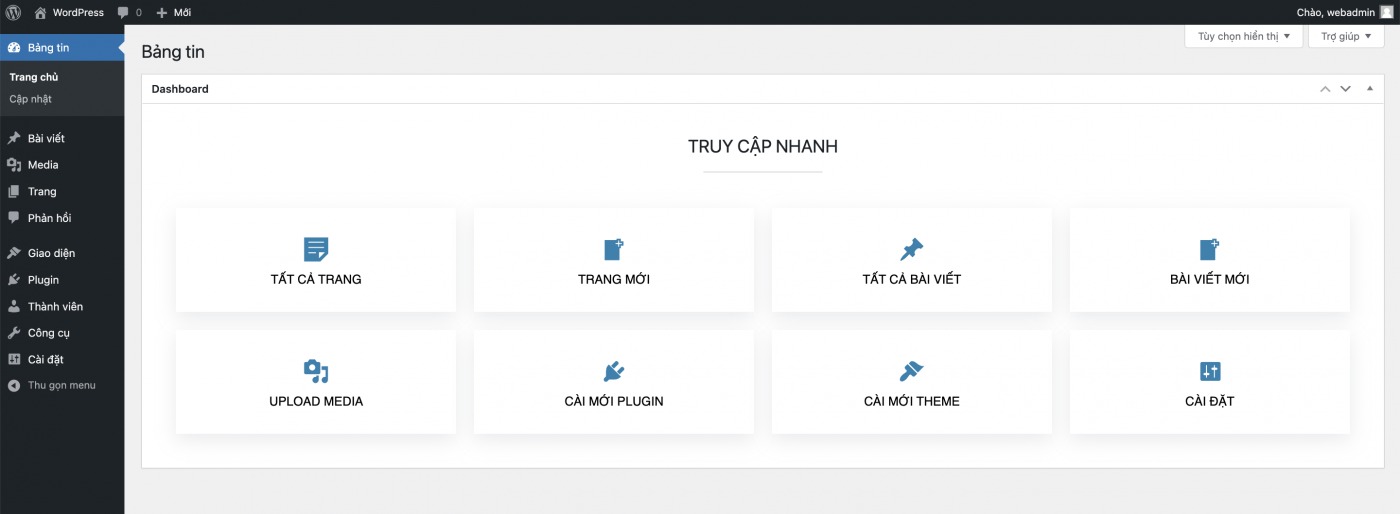
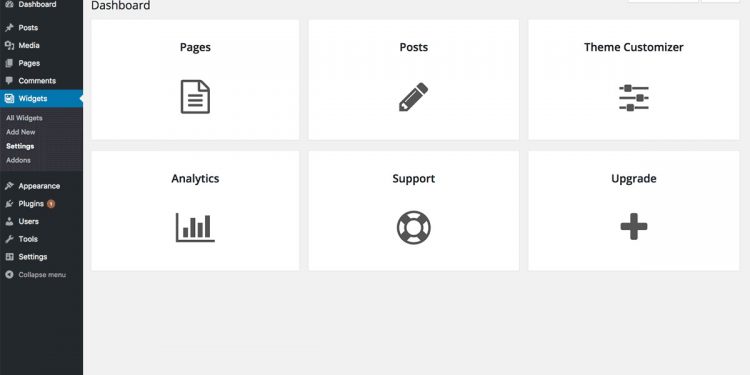
Bạn có cảm thấy giao diện bảng điều khiển trong phần quản trị WordPress quá rối rắm và chứa nhiều thông tin thừa thãi không? Hôm nay, tôi sẽ hướng dẫn custom bảng tin trong admin wordpress đẹp để phù hợp với nhu cầu của bạn.
Nếu bạn làm theo hướng dẫn của tôi, kết quả cuối cùng sẽ trông như hình minh họa dưới đây:

Loại bỏ các widget mặc định của WordPress
Khi mới cài đặt, bảng điều khiển WordPress thường chứa nhiều widget có sẵn. Trước tiên, chúng ta sẽ “dọn dẹp” trang bảng điều khiển để có một không gian làm việc gọn gàng hơn.
Để duy trì blog ngoài link rút gọn & mình có làm aff cho 1 số bên hosting.
Các nhà cung cấp uy tín về mặt chất lượng & đội ngũ support nên mọi người cứ yên tâm.
Nếu bạn đang có ý định mua Hosting, VPS mình có list dưới đây các bạn click vào link trước khi mua để ủng hộ mình nhé. Mình cảm ơn nhiều
- Azdigi: Giá rẻ thì dùng gói Pro Gold Hosting còn chất lượng hơn thì em khuyên dùng Business Hosting. Có điều kiện thì lên VPS nhé
- Tino: Business Hosting, NVMe Hosting và NVMe VPS
- iNet: Cloud VPS và Web Hosting
- Tenten: Wordpress Hosting, SSD Hosting, Cloud Server và Tên miền .VN
- Nước ngoài có: Vultr
Để thực hiện điều này, bạn cần thêm đoạn mã sau vào tệp functions.php của giao diện bạn đang sử dụng.
function hk_remove_dashboard_widgets() {
    global $wp_meta_boxes;

    remove_meta_box( 'dashboard_primary','dashboard','side' ); // WordPress.com Blog
    remove_meta_box( 'dashboard_plugins','dashboard','normal' ); // Plugins
    remove_meta_box( 'dashboard_right_now','dashboard', 'normal' ); // Tin nhanh
    remove_action( 'welcome_panel','wp_welcome_panel' ); // Welcome Panel
    remove_action( 'try_gutenberg_panel', 'wp_try_gutenberg_panel'); // Giới thiệu Gutenberg
    remove_meta_box('dashboard_quick_press','dashboard','side'); // Bản nháp
    remove_meta_box('dashboard_recent_drafts','dashboard','side'); // Bản nháp gần đây
    remove_meta_box('dashboard_secondary','dashboard','side'); // WordPress News
    remove_meta_box('dashboard_recent_comments','dashboard','normal'); // Bình luận
    remove_meta_box('dashboard_activity','dashboard', 'normal'); // Hoạt động

    unset( $wp_meta_boxes['dashboard']['normal']['core']['dashboard_site_health'] ); // Tình trạng website
}
add_action( 'wp_dashboard_setup', 'hk_remove_dashboard_widgets' );
Trong đoạn mã, tôi đã ghi chú tên của từng widget ở cuối mỗi dòng. Nếu bạn muốn giữ lại một số widget, đừng ngần ngại bỏ qua các dòng tương ứng.
Tạo custom widget cho bảng dashboard
Tiếp theo, hãy bổ sung đoạn mã dưới đây vào tệp functions.php để tạo tiện ích riêng cho bảng điều khiển của bạn.
function hk_welcome_dashboard() {
    global $wp_meta_boxes;
    wp_add_dashboard_widget('custom_support_widget', 'Dashboard', 'hk_dashboard_content');
}

function hk_dashboard_content() { ?>

    <div class="default-container">
        <h2>TRUY CẬP NHANH</h2>
        <hr>
    </div>

    <div class="icon-container">
  		<div class="column">
            <a href="/wp-admin/edit.php?post_type=page" class="pages">Tất cả Trang</a>
        </div>
  		<div class="column">
            <a href="/wp-admin/post-new.php?post_type=page" class="add">Trang mới</a>
        </div>
      	<div class="column">
            <a href="/wp-admin/edit.php" class="posts">Tất cả Bài viết</a>
        </div>
        <div class="column">
            <a href="/wp-admin/post-new.php" class="add">Bài viết mới</a>
        </div>
        <div class="column">
            <a href="/wp-admin/media-new.php" class="media">Upload Media</a>
        </div>
  		<div class="column">
            <a href="/wp-admin/plugin-install.php" class="plugin">Cài mới Plugin</a>
        </div>
        <div class="column">
            <a href="wp-admin/theme-install.php" class="theme">Cài mới Theme</a>
        </div>
        <div class="column">
            <a href="/wp-admin/options-general.php" class="settings">Cài đặt</a>
        </div>
  	</div>

    <!-- STYLE CSS -->
    <style>
    #wpbody-content #dashboard-widgets #postbox-container-1 {
    	width: 100%;
    }
    .default-container {
        display: grid;
        grid-template-columns: 1fr;
        padding: 20px 20px 0px 20px;
        text-align: center;
    }
    .default-container hr {
        height: 3px;
        background: #ebebeb;
        border: none;
        outline: none;
        width:10%;
        margin:1em auto;
        position: relative;
    }
    .icon-container {
        display: grid;
        grid-template-columns: 1fr 1fr 1fr 1fr;
        padding: 20px;
        text-align: center;
    }
    @media (max-width: 520px) {
        .icon-container {
            grid-template-columns: none;
            padding: 0px;
        }
    }
    @media (min-width: 521px) and (max-width: 767px) {
        .icon-container {
            grid-template-columns: 1fr 1fr;
            padding: 0px;
        }
    }
    @media (min-width: 768px) and (max-width: 990px) {
        .icon-container {
            grid-template-columns: 1fr 1fr 1fr;
            padding: 0px;
        }
    }
    .icon-container .column {
        background: #fff;
        box-shadow: rgba(149, 157, 165, 0.2) 0px 8px 24px;
        color: #000;
        font-family: "Ubuntu", sans-serif;
        font-size: 16px;
        margin: 3%;
        padding: 30px;
        transition: background-color 0.5s ease;
        text-transform: uppercase;
        text-align: center;
        text-decoration: none;
    }
    .icon-container .column a {
        color: #000;
        text-decoration: none;
    }
    .icon-container .column a:before {
        font-family: "dashicons";
        font-size: 34px;
        display: block;
        color: #2681B0;
        margin-bottom: 4px;
    }
    .icon-container .column:hover {
        background: #f9f9f9;
    }
    .icon-container .pages:before {
        content: "\f123";
    }
    .icon-container .posts:before {
        content: "\f109";
    }
    .icon-container .add:before {
        content: "\f133";
    }
    .icon-container .media:before {
        content: "\f104";
    }
    .icon-container .plugin:before {
        content: "\f106";
    }
    .icon-container .theme:before {
        content: "\f100";
    }
    .icon-container .settings:before {
        content: "\f108";
    }
    </style>

<?php }
add_action('wp_dashboard_setup', 'hk_welcome_dashboard');
Trong đoạn mã trên, phần từ dòng 8 đến dòng 38 chứa mã HTML, được sử dụng để xây dựng cấu trúc và nội dung của giao diện. Bắt đầu từ dòng 40 trở đi là phần CSS, điều chỉnh hình thức và bố cục của giao diện.
Bạn hoàn toàn có thể tùy chỉnh hoặc thiết kế lại toàn bộ giao diện theo sở thích cá nhân. Đừng ngại chỉnh sửa và sáng tạo để tạo ra một bảng điều khiển độc lạ và phù hợp với nhu cầu của bạn!
Sau khi làm xong các bước. Quay lại trang Bảng tin để xem thành quả thôi nào.
Lời kết
Và vừa rồi An Trần Digital đã hướng dẫn custom bảng tin trong admin wordpress trong lúc quá trình làm bị vướng chỗ nào thì đừng ngai gửi bình luận bên dưới và mình sẽ giải đáp.
Chúc các bạn thành công!!!


